
Welcome to my construction manual for a Death Krops of Krieg Basilisk

Surely this is not a Cost-effective conversion if you look at what Forgeworld Kits you need but I think you can modify it slightly and still achieve the same result.
What is needed?
I will confine myself here to the pure components, etc. you need. I used a ARMAGEDDON PATTERN MEDUSA, of course you can also use the ARMAGEDDON PATTERN BASILISK. For this purpose, a HEAVY ARTILLERY CARRIAGE WITH EARTHSHAKER CANNON, a lot of parts of my Bitz Box, plastic profiles and plastic carton joined with and without details. For this purpose I have some photos for you:


Construction of the lower gun cabin
I will try to show you each step of the conversion. In the pictures I think its good to see what I have done and which component changed. The vehicle is an ordinary chimera, so I will not go into their construction because nothing has changed on the basic framework. So we start with the lower gub cabin of the Basilisk and the changes to this. The red parts are areas that need to cut away her so that everything fits together. Likewise, all the rivets are cut on the Forge World entirety, as they are all different in size and do not match to those of the chimera.


When we adjusted for the above-indicated places, we need a bottom plate. I wanted to represent it so that the artillery shells stored partially under the floor in shafts. In order to remain true to the scale I measured the original grenades Forge World, they are 1,6 cm high. This makes it clear how high the base plate should be installed. In order to keep the base plate stable, should be made 6 pillars. Also the segments of the base plate are cut. For the "magazine" and the "checker plate" served Evergreen polystyrene plates. Since that checker plate is very thin, I used normal polystyrene in the same thickness to bring it to the same level as the magazine plate to facilitate adhesion.


In the last picture you can see the lower part of the interior after removing the disturbing details. In addition, you see the cut pillars and the bonded bottom plate.
In order to provide the panels of each tray with handles, I used a 2.8mm drill with whom I drilled 1mm deep and then the half-round Evergreen profiles sink in it. The red X's do not get holes because upon them rest the carriage of the gun.
After attaching the handles in the holes, the pillars are glued to the bottom.

Now we glue the floor plate with the lower part of the housing and close the remaining open area between the pan and the bottom plate with polystyrene plates, this need not be very clean, as we later fill in the bends of the plates with Green Stuff to obtain curves that look like as it would be a single plate.

In order that the upper part of the cabin fits later, the pieces shown below must be inserted.

Construction of the upper gun cabin
The upper segment of the gun cabin is also heavily edited as the lower. All exterior details, incl. the rivets are removed, the only exception being the big screw heads on the front armor and the little box that is located on one side. In the following pictures will be seen by red markings which must be removed again.


After removing the marked parts, the armor should look like this.
The upper segment of the gun cabin is also heavily edited as the lower. All exterior details, incl. the rivets are removed, the only exception being the big screw heads on the front armor and the little box that is located on one side. In the following pictures will be seen by red markings which must be removed again.
After removing the marked parts, the armor should look like this.


Now we start with the expansion of the upper cabin. As the artillery of Death Korps need so many grenades the lower ammunition chamber would certainly not enough, I wanted to use the area of the side shelves for more grenades. For this purpose the side shelves must be attached to the armor, so you can identify the dimensionsin the last picture.
Now that we have attached the side shelves, we have enough space for the fastenings of the shells we now install. For this, use a L-profile and more Evergreen profiles. The length of each stripe can be seen in the next picture. This is of course changeable at will. I decided to install am small computer on one side so that the crew can get fire commands etc. and it gives a little more detail.

Now that we've attached the two rails, we must of course create more individual compartments for grenades. For this we use again the Semicircular profiles, as well as the small computer is fitted. The last step of the upper gun cabin the two ends are resealed with Polysryrol plates.
After that the interior of the upper cabin gun is ready and it can be adhered to the bottom. When this is complete, we use Green Stuff to close all outstanding gaps. Give the usual time to dry the whole and then use sandpaper to bring everything to a level.


Attaching the Rivets
Now the real work begins which can take a long time to complete. After a long search and testing how to add Rivets quickly and cheap, I've decided to open a commercial Britta water filter and use the content for it. You can buy these filters actually in any supermarket and be actually used for descaling tap water and to bind any bacteria in the filter. They are made inside of small coal, which is totally uninteresting for us and thousands of small white balls in various sizes. I recommend everyone Before mounting the rivets the appropriate size, to which the chimera fit to gather in sufficient quantities with a pair of tweezers from the filter. This guarantees that you always use the same size.

After that the interior of the upper cabin gun is ready and it can be adhered to the bottom. When this is complete, we use Green Stuff to close all outstanding gaps. Give the usual time to dry the whole and then use sandpaper to bring everything to a level.
Attaching the Rivets
Now the real work begins which can take a long time to complete. After a long search and testing how to add Rivets quickly and cheap, I've decided to open a commercial Britta water filter and use the content for it. You can buy these filters actually in any supermarket and be actually used for descaling tap water and to bind any bacteria in the filter. They are made inside of small coal, which is totally uninteresting for us and thousands of small white balls in various sizes. I recommend everyone Before mounting the rivets the appropriate size, to which the chimera fit to gather in sufficient quantities with a pair of tweezers from the filter. This guarantees that you always use the same size.
If this is done, you take a small drill bit to fit the size of the selected rivets. Draws you with a small pencil Edding or the places where you want to have the rivets. So you can see in advance how large must put their distances and get nice straight lines. I have previously measured all surfaces in my model and chosen a distance of 5-6 mm.
I recommend advance on a piece of polystyrene to practice the right depth you need to drill.
If the holes are pre-drilled you apply your rivets with a pair of tweezers and superglue.
After that it should look like in the following pictures.


Ladder and rear bumpers
The Ladder is a normal component from the Basilisk kit.
In order to absorb the recoil to this huge gun, i thought it would be nice to apply some rear bumbers. In addition, it makes a lot of details that the relatively empty rear of the tank covered and ensures "realism" and "life" on the model.
For the rear bumper a normal Dozerblade from the kit of a chimera had to serve. This was cut exactly in the middle and further "adjusted" to the beginning of the recording carrier. Similarly, both ends were "cleaned" in order to achieve a similar appearance, this you can see in the pictures below.


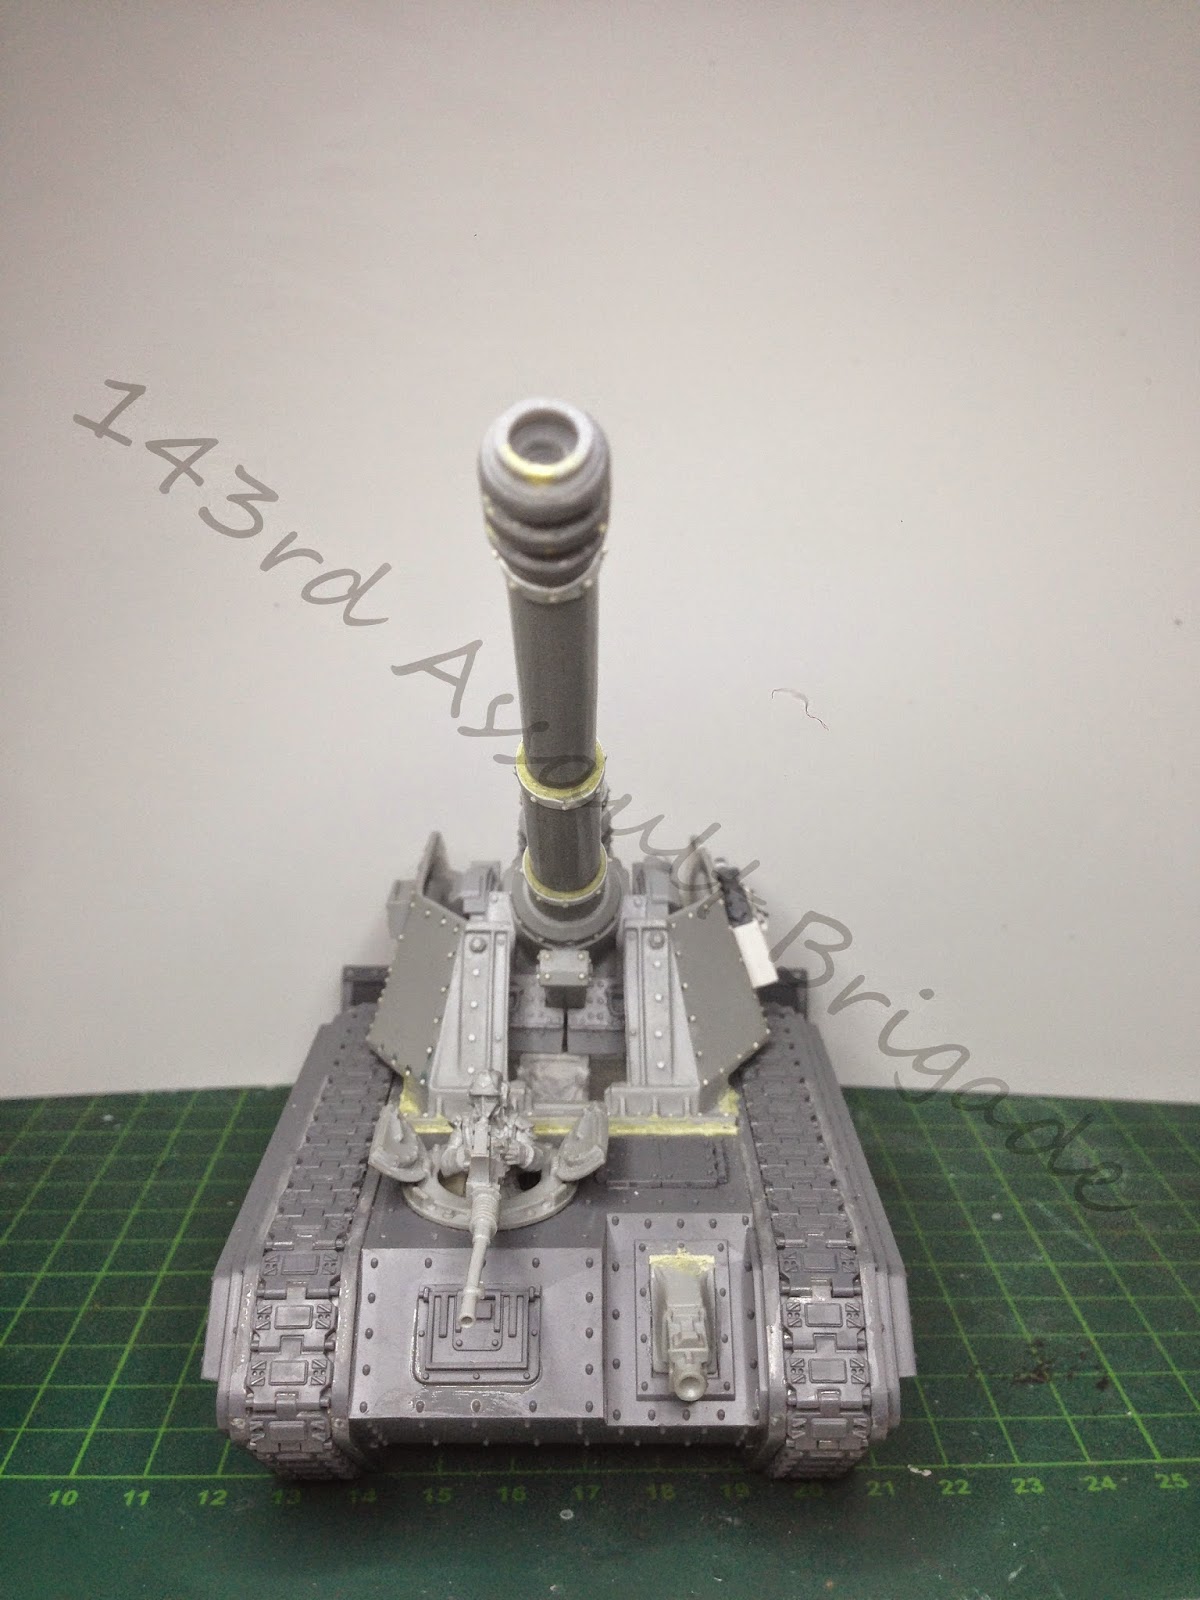
Gun carriage and gun
Since I always found the guns of basilisk very boring, I have long wondered how could they spice up with more details. I have viewed a lot of parts for this from my Bitzbox, stopped and then decided on theForgeworld Vanquisher cannon. For this purpose, a double piston spring joined to clarify much much recoil must be absorbed and for Crewprotection i applyed a little Gunshield.
The carriage itself has not changed, but received as the cannon, magnets to keep everything mobile and if necessary be replaced with other guns.
The following pictures show self-explanatory how and where the parts have been mounted. Likewise it is to see where rivets were attached.


I recommend advance on a piece of polystyrene to practice the right depth you need to drill.
If the holes are pre-drilled you apply your rivets with a pair of tweezers and superglue.
After that it should look like in the following pictures.
Ladder and rear bumpers
The Ladder is a normal component from the Basilisk kit.
In order to absorb the recoil to this huge gun, i thought it would be nice to apply some rear bumbers. In addition, it makes a lot of details that the relatively empty rear of the tank covered and ensures "realism" and "life" on the model.
For the rear bumper a normal Dozerblade from the kit of a chimera had to serve. This was cut exactly in the middle and further "adjusted" to the beginning of the recording carrier. Similarly, both ends were "cleaned" in order to achieve a similar appearance, this you can see in the pictures below.
Gun carriage and gun
Since I always found the guns of basilisk very boring, I have long wondered how could they spice up with more details. I have viewed a lot of parts for this from my Bitzbox, stopped and then decided on theForgeworld Vanquisher cannon. For this purpose, a double piston spring joined to clarify much much recoil must be absorbed and for Crewprotection i applyed a little Gunshield.
The carriage itself has not changed, but received as the cannon, magnets to keep everything mobile and if necessary be replaced with other guns.
The following pictures show self-explanatory how and where the parts have been mounted. Likewise it is to see where rivets were attached.
Pictures


Last words
I hope you had pleasure to read these instructions and perhaps replicate. Should questions arise regarding the construction manual or which is related to other issues Death Korps and all about them, contact me here.
If you want to support me, so that further assembly instructions can cause then you will find a Donation Link below.
I thank you and hope you enjoy building.
143rd Assault Brigade
No comments:
Post a Comment